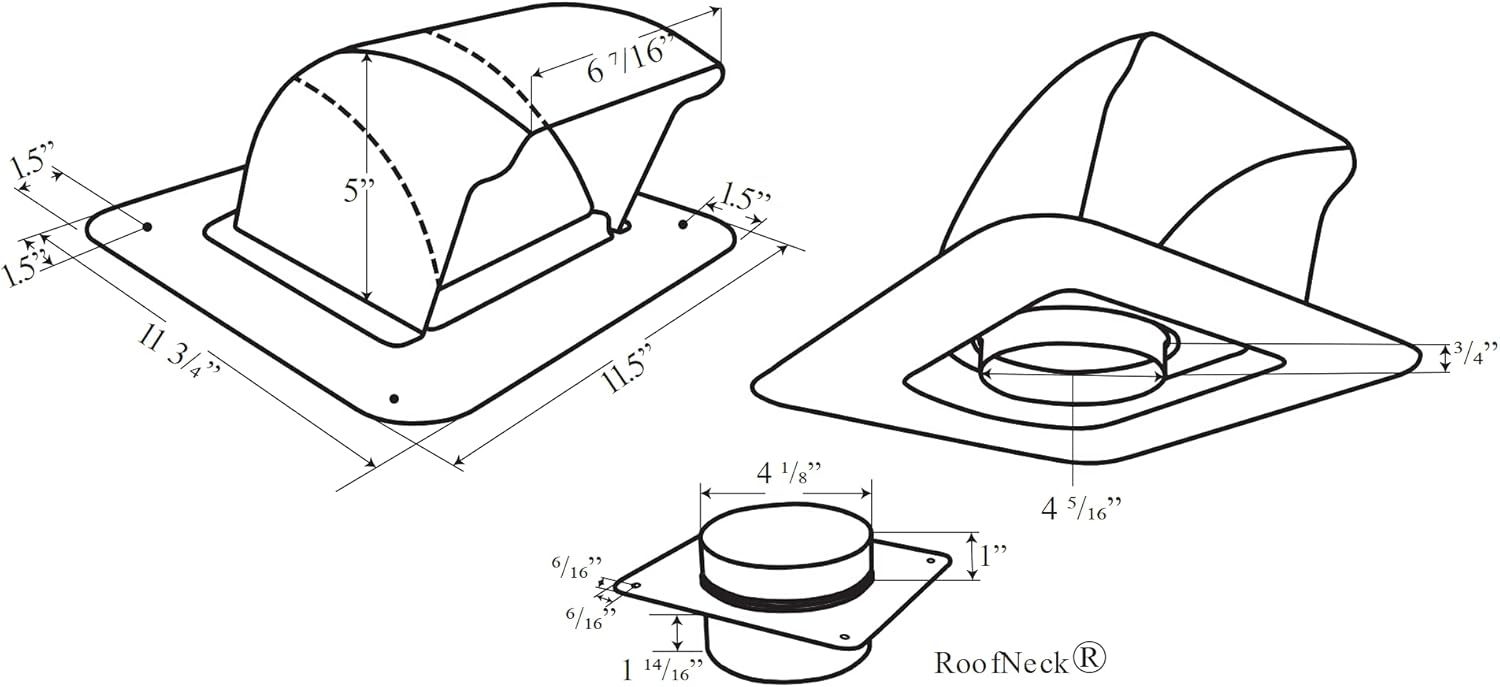
The RoofNeck is a transition connection between the internal duct work and external roof vent termination.
It allows for easy connection and more accurate installations, especially when the HVAC installers and roof installers are not installing at the same time. The RoofNeck can be installed on the exterior of the roof by the roofing team and can be easily connected to the interior duct work when that is installed in the attic. Conversely, the HVAC team can install the RoofNeck on the attic interior when installing duct work prior to the roof being completed, allowing easy connection of the vent termination when the time comes to attach a roof vent, such as the DryerJack.
This is for the RoofNeck piece only, no dryer vent, or exhaust tube is included.
Make stronger connections between the internal duct work and the external roof vent with The RoofNeckTM. The RoofNeck makes it easier for the duct installers to perform their work separately from the roofing team. Installations are faster and stronger.
The RoofNeck works well with a non-collared roof vent, such as the DryerJack DJK477. Made in the USA from heavy 26 gauge Galvalume steel, this product is best suited for sloped roofs with flat profile cement tiles and other composite shingles. Does not provide adequate clearance in height for "S" or Barrel Tile roofs.
RoofNeck™ Installation
*Not designed for flat roof installation.
- Determine location for roof vent installation. If replacing an existing roof vent, use caution as ductwork may be attached.
- Cut 4-1/4” circular hole in roof deck material. Skip step if replacing an existing vent.
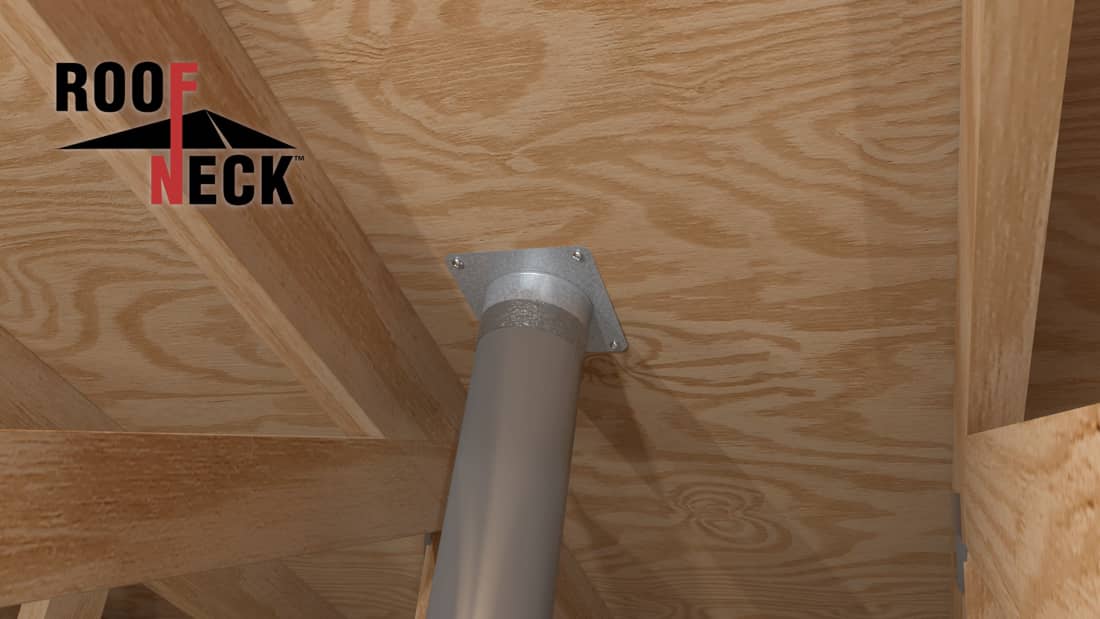
- RoofNeck flange may be installed from above or underneath roof deck material.
- From above roof deck, insert longer portion of collar into the hole. (Figure A)

- From below roof deck, insert shorter portion of the collar into the hole. (Figure B)

- From above roof deck, insert longer portion of collar into the hole. (Figure A)
- Ensure the “→” on flange is pointing in the downward slope direction.
- Screw flange to deck. Screw length should NOT be longer than roof deck material thickness.
- Insert end of ductwork to the inside of RoofNeck collar. Secure with foil tape and mechanical fasteners per code. Adjustable elbow or elongated smooth elbow (Dryer Ell #LT45) may be needed to account for roof pitch.
- Install roof vent per instructions.
*Disclaimer: Professional installation is recommended.